

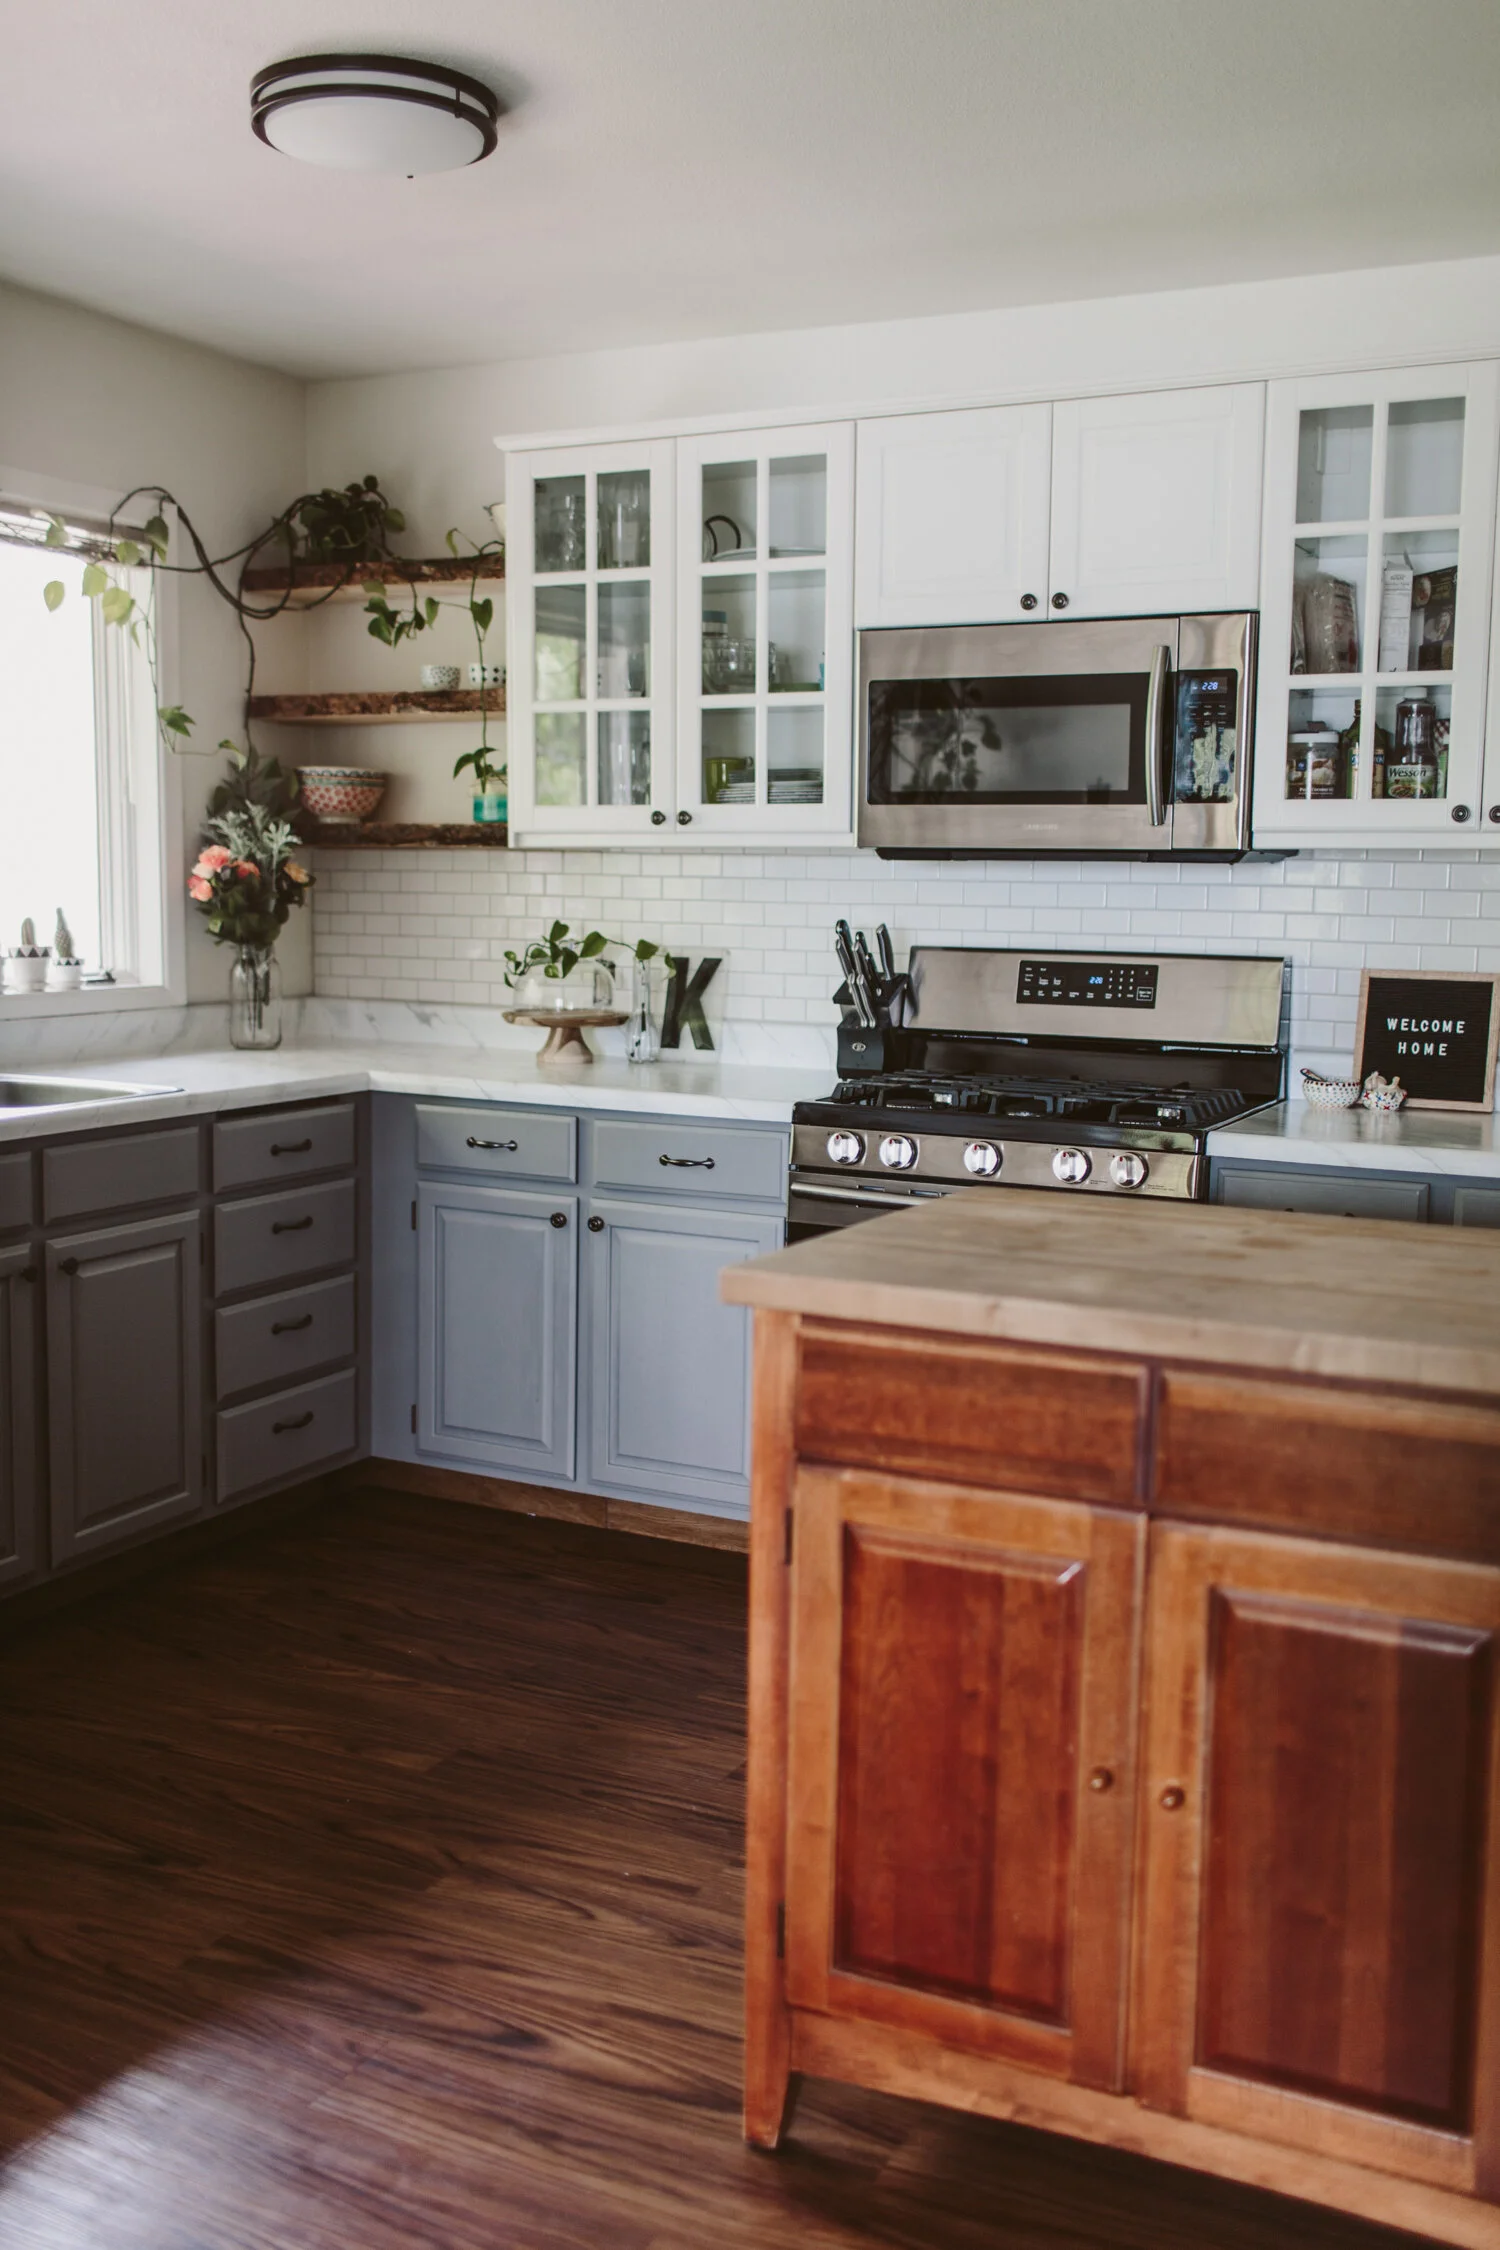
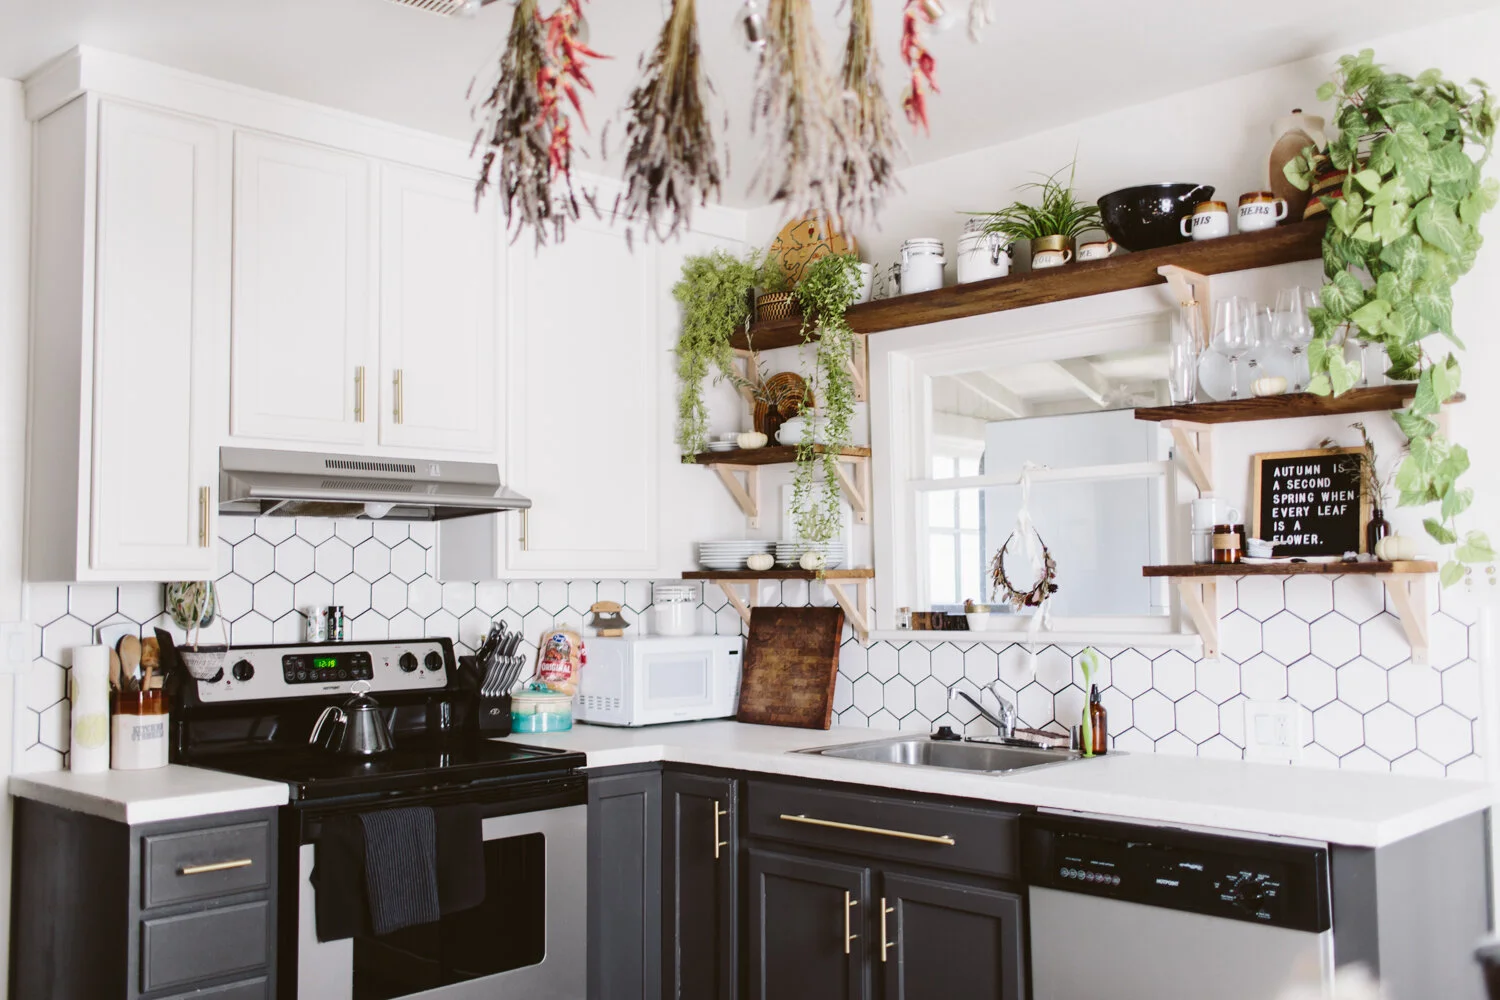
Transform your kitchen with DIY painted cabinets
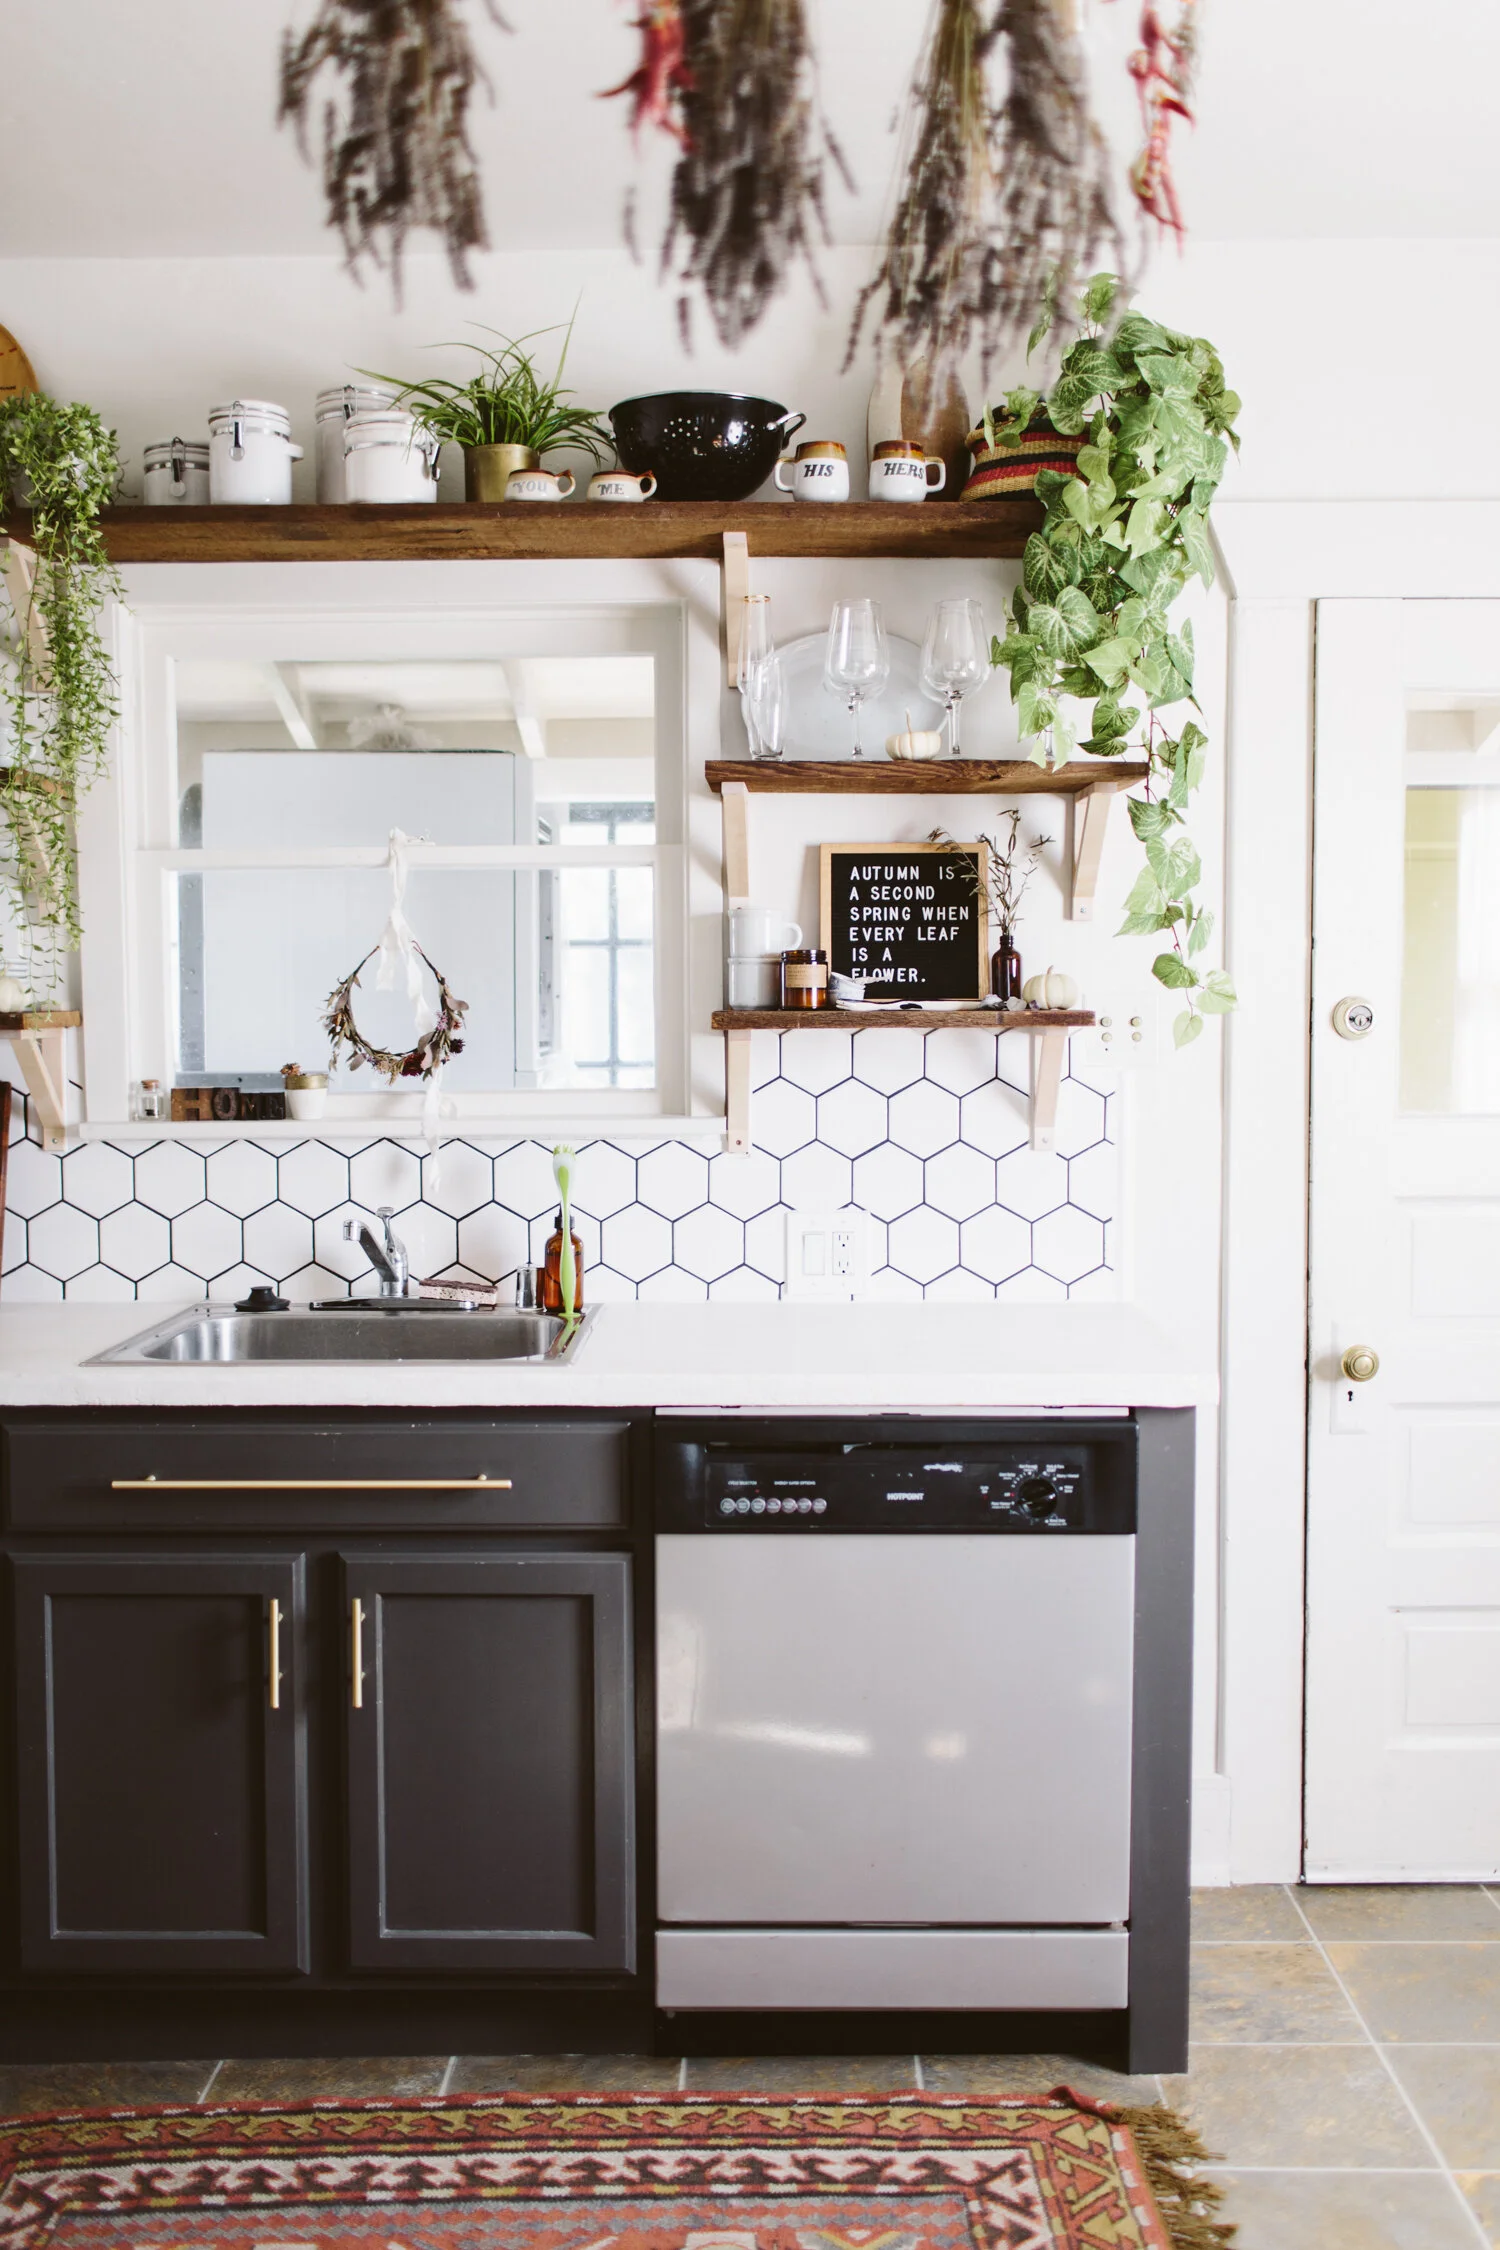
Painting kitchen cabinets can feel intimidating, or even sacreligious, but I believe that it’s one of the easiest, most affordable ways to completely transform your kitchen. I lived in our kitchen for years wanting to paint the cabinets, but felt bad painting them because they looked relatively new and were perfectly fine. But here’s the thing, I LOVE our kitchen after painting the cabinets. It feels so much more “us,” it feels modernized, and custom (vs. basic builder grade).
I’ve painted cabinets in three different kitchens now and I love each transformation. In some, I’ve replaced the upper cabinets with new ones, to freshen up the look (like in the before/after below), or put in open shelving, and in others I’ve painted both the lower and upper cabinets.

01/ Remove doors and hardware
This one is kind of optional. Removing drawer pulls and knobs is not: you’re definitely gonna want to remove those, it only takes a couple minutes and a screwdriver. But removing doors is up to you. It’s definitely easier to prep and paint them separately, but I have painted cabinets with the doors on and it works too! If you don’t have a garage or somewhere that you can set up a painting area, leaving the doors on is workable!
02/ Clean + degrease your cabinets
You’ll want to make sure you have a clean surface to paint, free from kitchen gunk and grease. Lower cabinets that aren’t near the oven don’t tend to have as much grease, but cabinets over the stove can have grease build-up that will definitely need to be removed in order for the paint to stick well. Use TSP or a similar cleaner to clean your cabinets first. Do all the surfaces you plan on painting. I have never painted the interior of cabinets, mostly because it seems like a pain and I don’t mind the insides having the original wood, but you’d follow the same steps laid out here.
03/ Sand and/or degloss your cabinets
Next, you’ll want to remove some of the glossiness on the cabinets so the paint will stick well. I use Liquid Sandpaper first, and then if I feel like I still need to rough up the surface a bit more, I’ll hit it with a fine grit sandpaper like 220 grit.
04/ Prime!
There are tons of primers out there, some specially designed for furniture and some that say they’ll stick to basically anything. I use Kilz for basically everything, so that’s what I’ve used on all my cabinet painting jobs, as well as to paint metal file cabinets and it seems to work really well.
With primer and paint, you have a couple options. I’d say the best option for a smooth surface is using a paint sprayer. We have a pretty heavy duty sprayer because we bought it to do the exterior of our house, but there are smaller, more affordable ones available that would work for painting cabinets. For spraying, I would recommend just doing the doors and setting up a spray booth in a garage or other workspace with plastic sheeting and drop cloth, unless you feel like masking off your entire kitchen and spraying the whole cabinet. We sprayed the doors, then used brushes and 4-in smooth rollers for the cabinets themselves. One coat of primer should do the trick.

05/ Paint!
Now the fun part! You’re gonna want to get a nice paint. I’ve used Behr Marquee for all my cabinets because it does a nice job of self leveling and the coverage is amazing. Behr also makes an Alkyd paint that is designed for cabinetry and was recommended, however they have limited paint colors available for that paint and I’m too picky with my colors. I’ve never had a problem with using the Marquee.
When it comes to picking a sheen, I’ve discovered that I prefer eggshell. I’ve used semi-gloss in the past thinking that the glossiness would be easier to wipe down, but I’ve found that semi-gloss and gloss paints tend to, like, not stick as well? I don’t know, they seem like they can be scratched easier, and for cabinets when there are fingernails scratching when you grab for drawer pulls, I’ve had the semi-gloss paint scratch off, but the eggshell doesn’t.
I’d recommend at least two coats, possibly three, depending on how it looks after two. Again, if you’re spraying, spray the doors and then roll + brush the cabinets. Allow the right dry time between coats based on what your paint recommends.
Also, I should note that I have not used a sealer or top coat on my painted cabinets yet, but with my most recent cabinet painting project I’m thinking of finding one so I can see if it’s something I recommend. For some reason I just never thought to put a top coat on, so I’m going to do some research and testing to see if there’s something I like and I’ll update this accordingly!

Hi, I’m Liz
I'm an artist, writer, designer, DIY renovator, and … well basically I like to do all the things. If it’s creative I’m probably doing it. I’ve spent over 30 years voraciously pursuing a life steeped in creativity and I wholeheartedly believe creativity and joy are inextricably linked.
Read more…


Explore The Archive
- January 2025
- December 2024
- August 2024
- July 2024
- May 2024
- April 2024
- January 2024
- December 2023
- October 2023
- September 2023
- July 2023
- June 2023
- May 2023
- April 2023
- March 2023
- February 2023
- January 2023
- December 2022
- November 2022
- October 2022
- August 2022
- June 2022
- May 2022
- April 2022
- March 2022
- November 2021
- October 2021
- August 2021
- July 2021
- May 2021
- January 2021
- November 2020
- October 2020
- September 2020
- August 2020
- July 2020
- June 2020
- May 2020
- April 2020
- February 2020
- January 2020
- November 2019
- October 2019
- August 2019
- July 2019
- June 2019
- May 2019
- April 2019
- February 2019
- January 2019
- December 2018
- November 2018
- October 2018
- September 2018
- August 2018
- July 2018
- June 2018
- May 2018
- April 2018
- February 2018
- January 2018
- November 2017
- September 2017
- August 2017
- July 2017
- June 2017
- May 2017
- April 2017
- March 2017
- February 2017
- January 2017
- December 2016
- November 2016
- October 2016
- September 2016
- August 2016
- June 2016
- May 2016
- April 2016
- March 2016
- February 2016
- January 2016
- December 2015
- November 2015
- October 2015
- September 2015
- August 2015
- July 2015
- June 2015
- May 2015
- April 2015
- March 2015
- February 2015
- January 2015
- December 2014
- November 2014
- October 2014
- September 2014
- August 2014
- July 2014
- June 2014
- May 2014
- April 2014
- March 2014
- February 2014
- January 2014
- December 2013
- November 2013
- October 2013
- September 2013
- August 2013
- July 2013
- June 2013
- May 2013
- April 2013
- March 2013
- February 2013
- January 2013
- December 2012
- November 2012
- October 2012
- September 2012
- August 2012
- July 2012
- June 2012
- May 2012
- April 2012
- March 2012
- February 2012
- January 2012
- December 2011
- November 2011
- October 2011
- September 2011
- August 2011
- July 2011
- June 2011
- May 2011
- April 2011
- March 2011
- February 2011
- January 2011
- December 2010
- November 2010
- October 2010
- September 2010
- August 2010
- July 2010
- June 2010
- May 2010
- April 2010
- March 2010
- February 2010
- January 2010
- December 2009
- November 2009
- October 2009
- September 2009
- August 2009
- July 2009
- June 2009
- May 2009
- April 2009
- March 2009
- February 2009
- January 2009
- December 2008
- November 2008
- October 2008
- September 2008
- August 2008
- July 2008

VISIT THE SHOP


PRIVACY POLICY & DISCLOSURE
We are a participant in the Amazon Services LLC Associates Program, an affiliate advertising program designed to provide a means for us to earn fees by linking to Amazon.com and affiliated sites.