

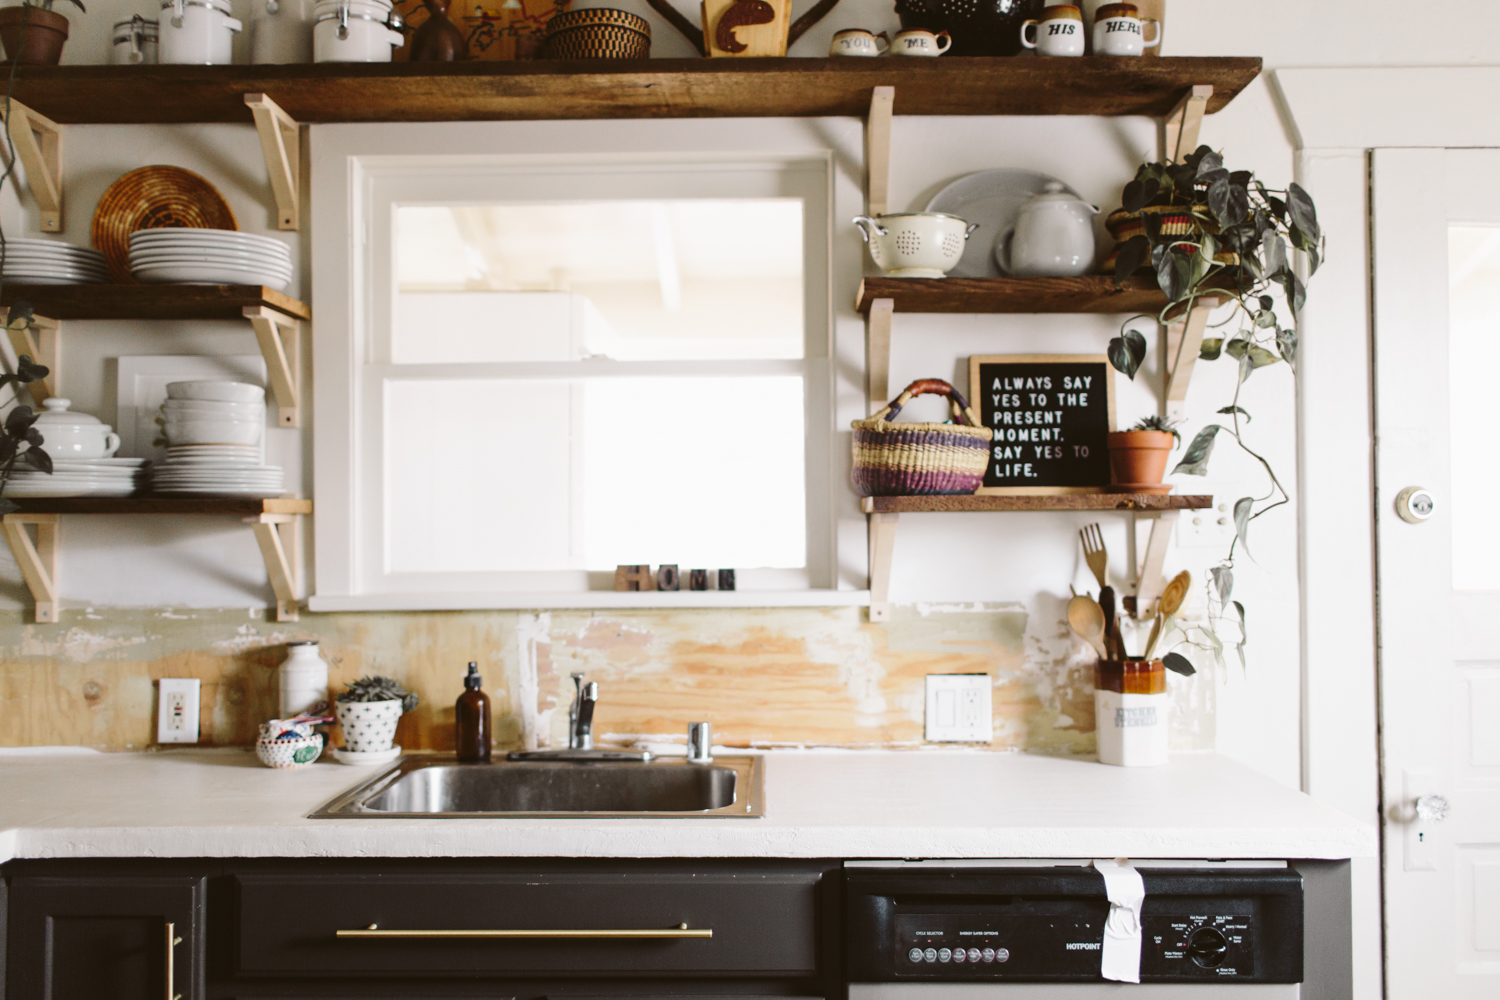
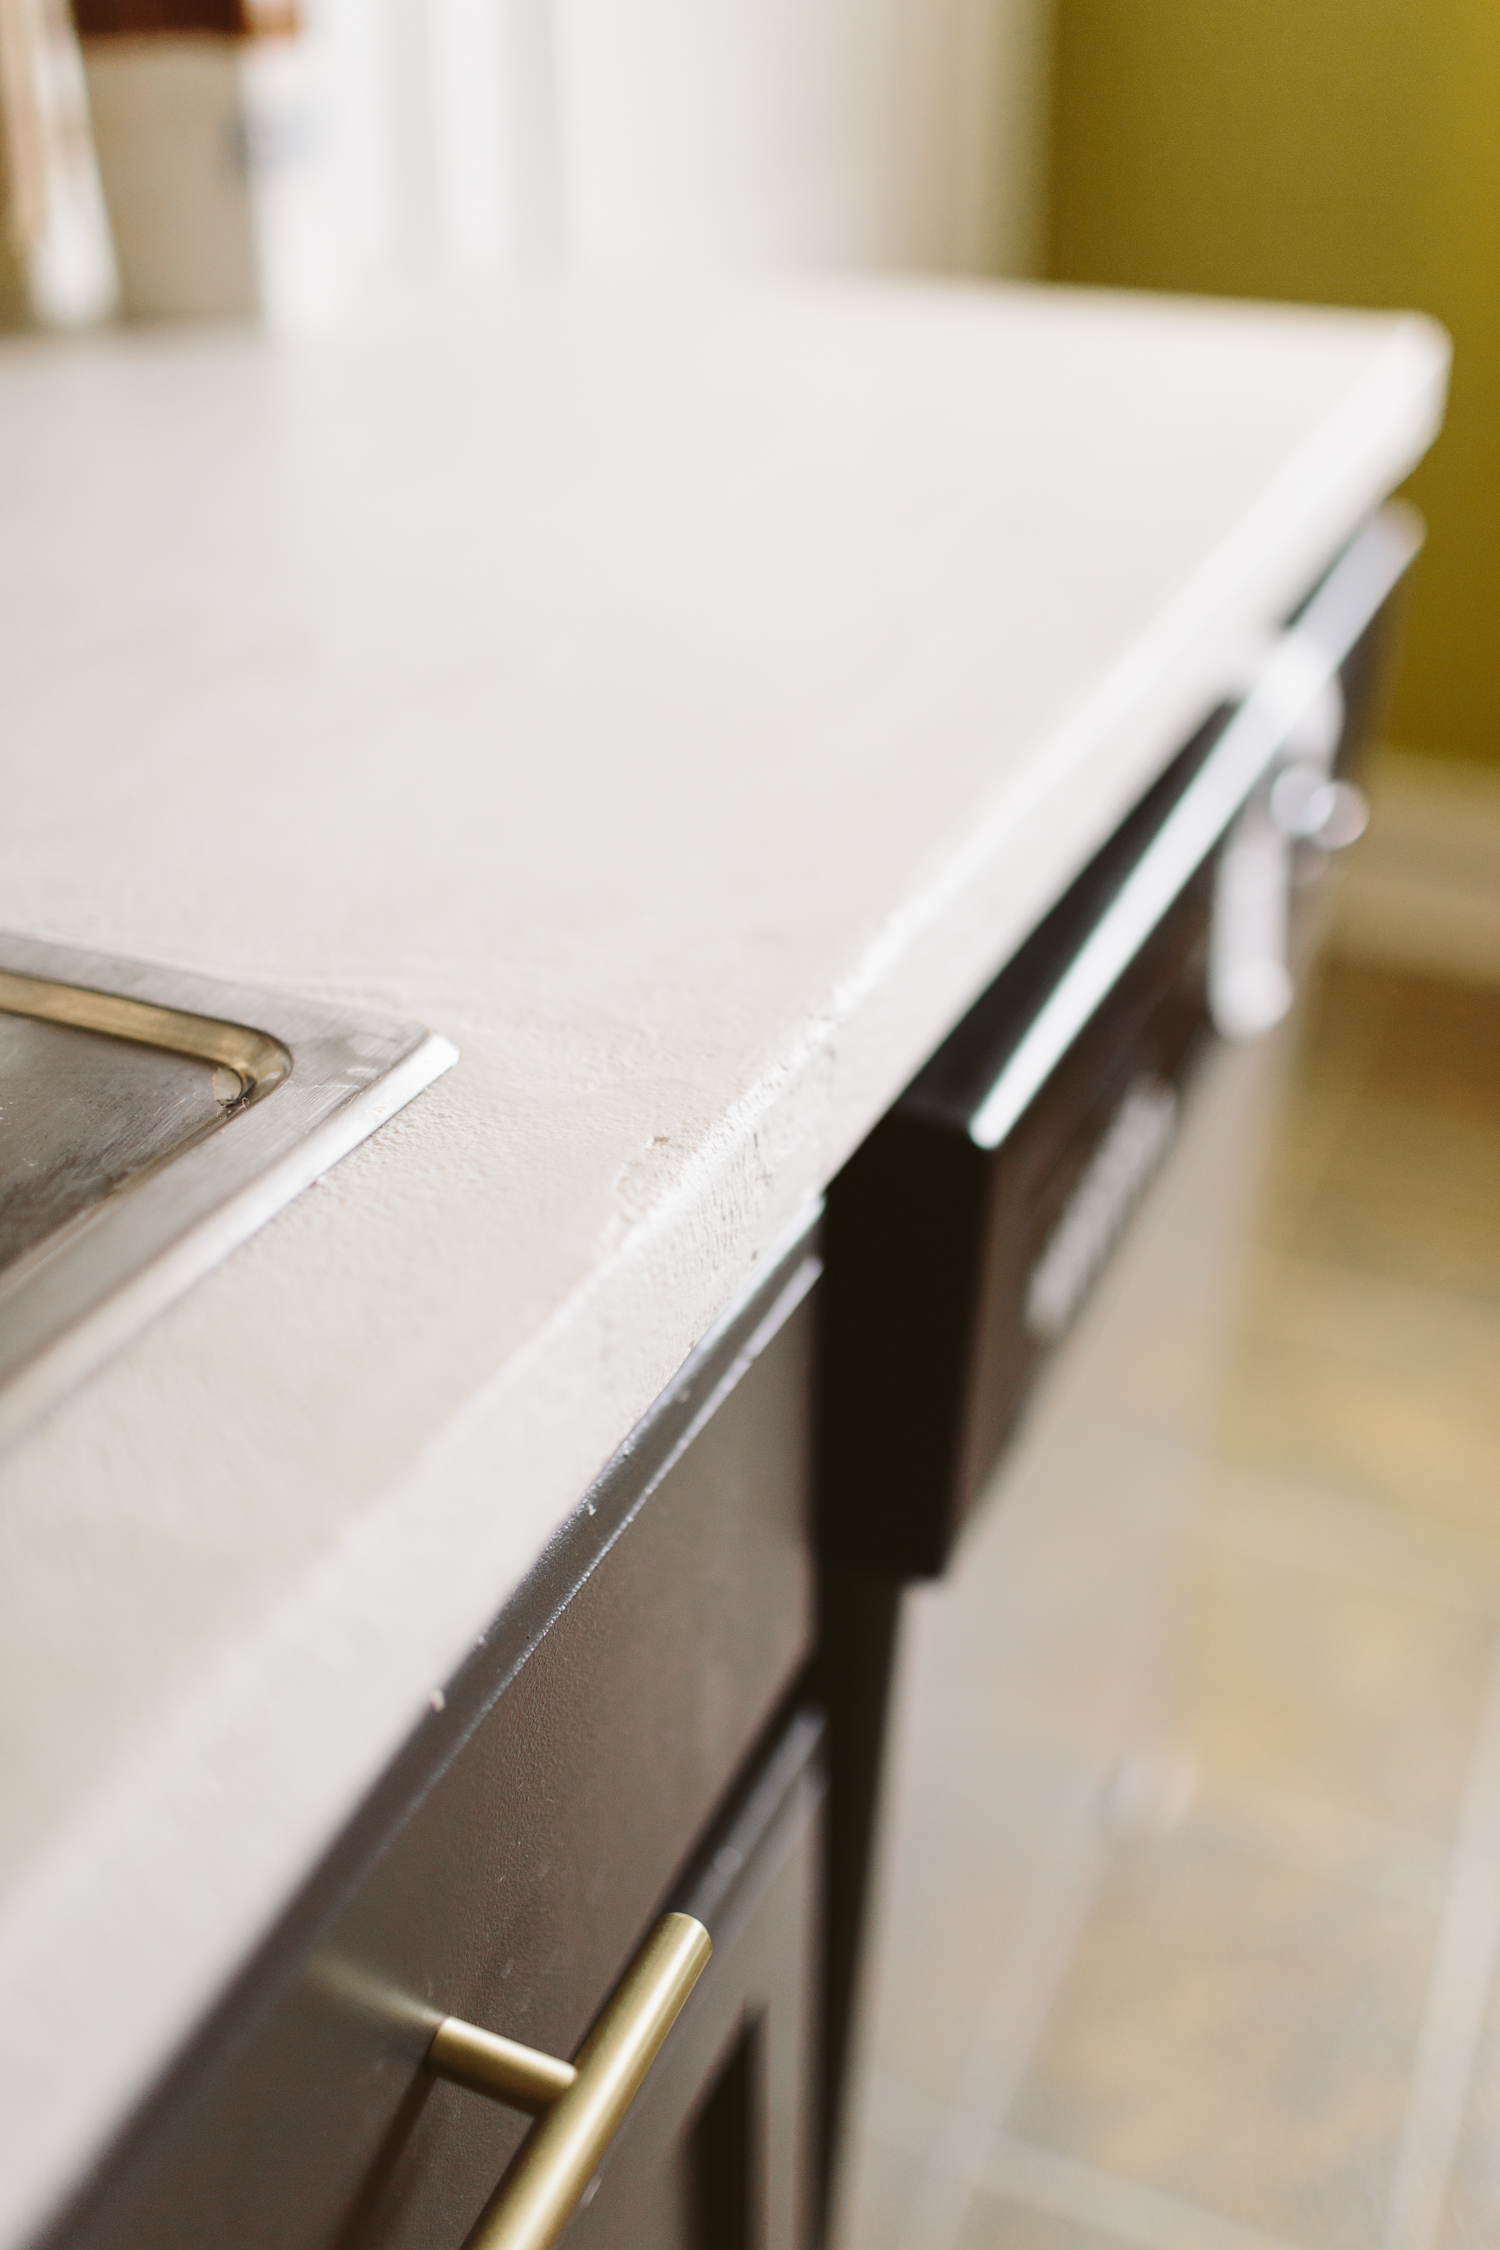
DIY White Concrete Skimcoat Countertop

I was hoping to have my backsplash done in time to take some "after" photos of my counter, but that project is just taking too long to complete, so I'm getting this post up anyway, demo'd backsplash on full display!
I'm super thrilled about this DIY for multiple reasons. Not only does it create a super cool finish that's a little bit industrial, a little eclectic, a little farmhouse, but it's fast, pretty easy, and it's AFFORDABLE. That last one is really important to us because we just don't have money to throw around on new counters (and to be honest, the reason our backsplash has looked this way for almost 3 months is because I haven't been able to afford the tile).
I did a little research on what product I wanted to use. Originally I had planned on doing walnut butcher block counters in our kitchen but since we weren't replacing the cabinets I was worried that removing the original counters would damage the cabinets. We're also thinking about eventually putting this house up for rent and I was concerned that a more high maintenance substance like butcher block wouldn't fare as well with renters. Concrete answered both of those problems, as well as the financial issue as well. Butcher block (even the fake Ikea stuff) was around $3 - 400, which is super affordable compared to a lot of counter options out there, but this skimcoat product only cost me $173. That's a price I can get behind.
Since I'd already painted the cabinets a dark grey, I was worried that doing the regular grey concrete color would just make for too much grey in the space and make it feel too cool (as in cool toned, not like... awesome cool), and I'd just seen a friend do white concrete counters and loved that look, so I went on the search for a skimcoat product that would allow me to do white concrete.
I found what I was looking for with Direct Colors Inc. They do a concrete overlay product that is specifically designed to skimcoat formica counters, which is what we had. I bought their DCI Concrete overlay, with smooth texture, white base color, and added the Pearl color pack, which was supposed to make it even more white (I didn't make a batch of it without the pearl color added, so I'm not sure how white the white base would be without it, but I think it'd probably be plenty white if you wanted to skip that. It cost $10.95 more). I also bought the 550 Water Based matte Polyurethane Concrete Sealer in the Matte finish (I didn't want shiny counters). And I added on a Magic Trowel because I didn't have a trowel to smooth things out. I didn't realize that I should've also bought a primer sealer which should go on before the 550 Water Based Sealer, so I'd recommend getting that too and applying it before the 550 sealer. Our counter is working fine, though, with two coats of the 550 Water Based Polyurethane Concrete Sealer.
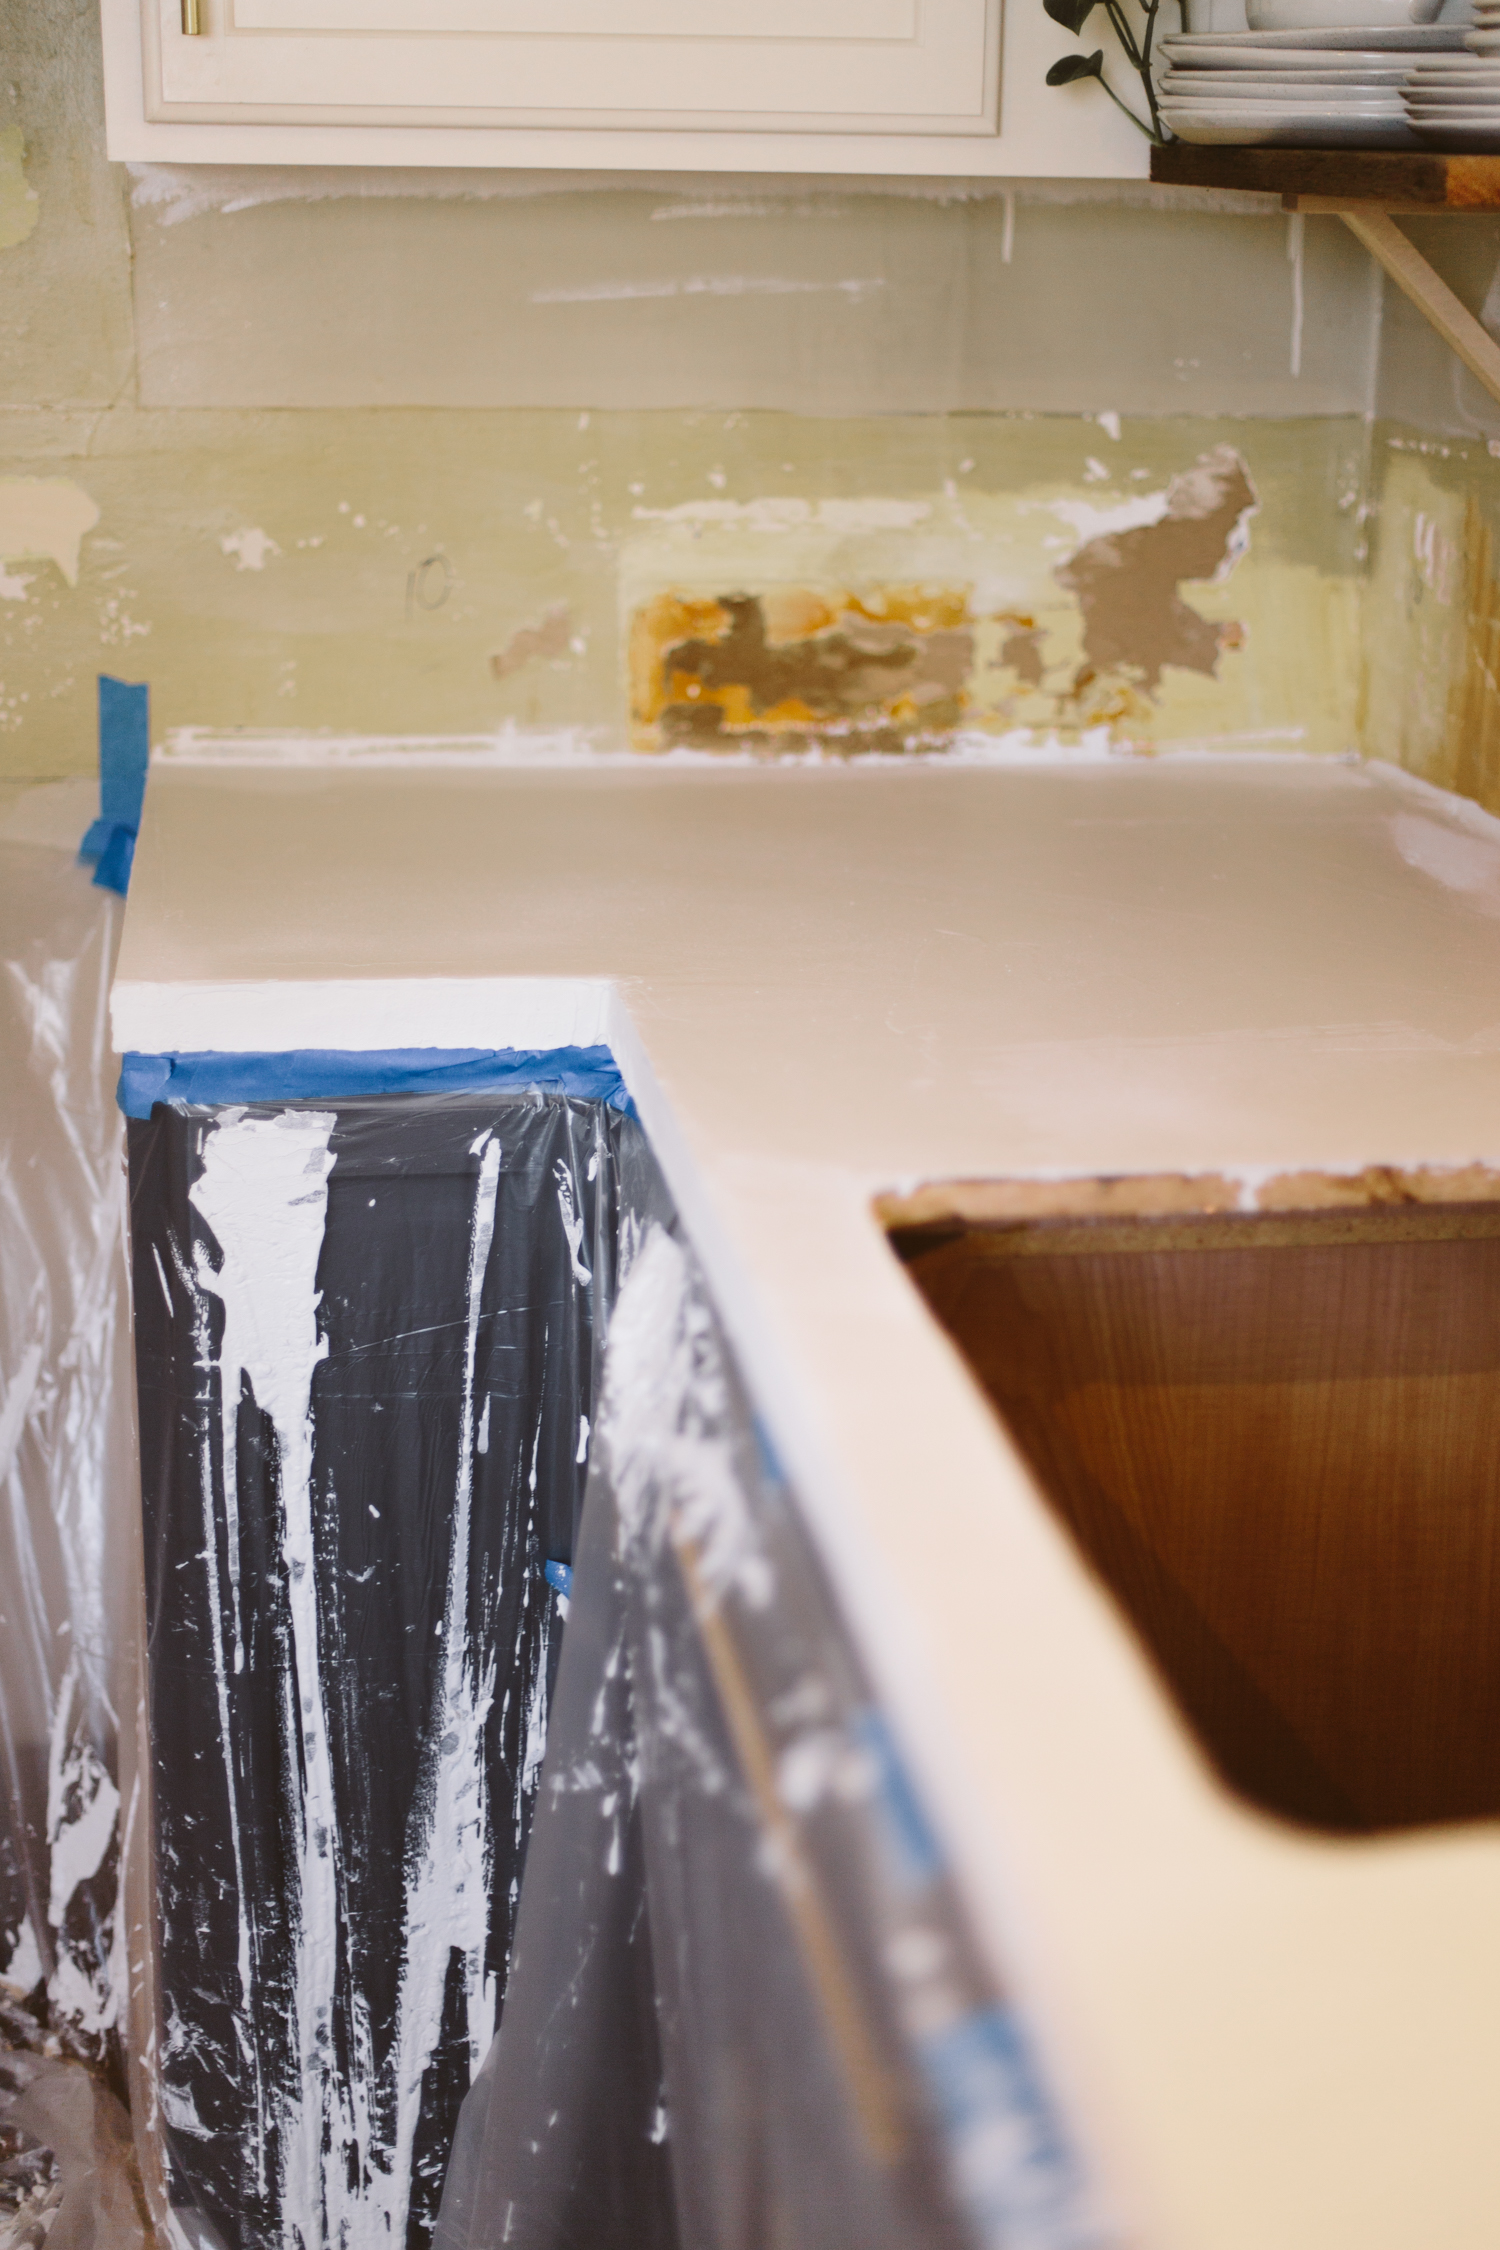
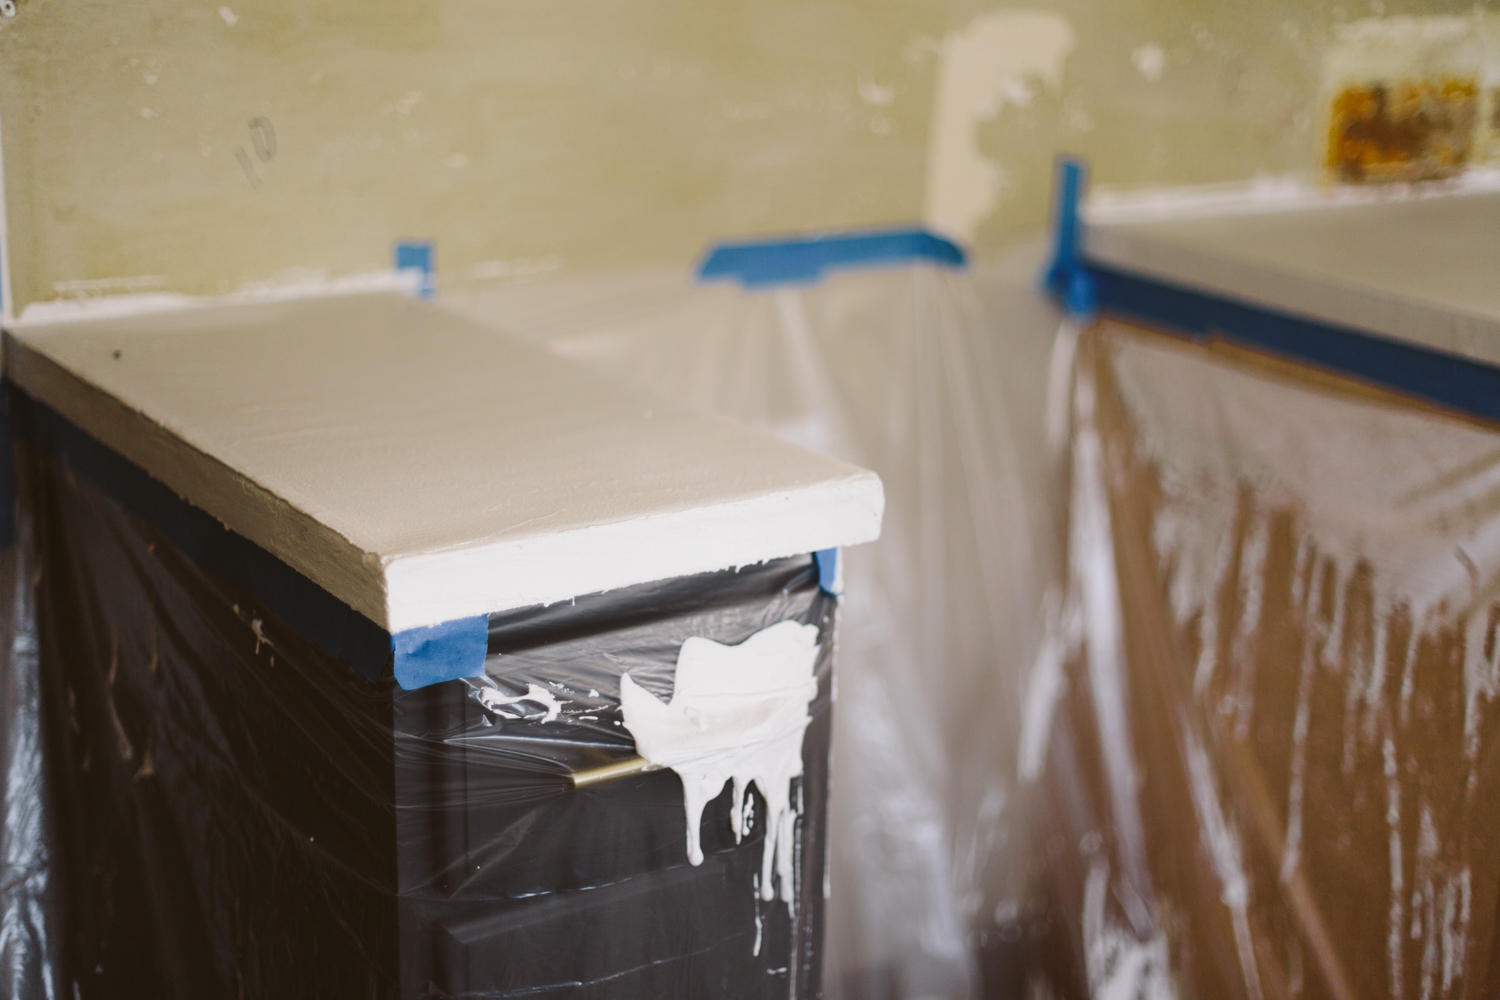
You're really gonna want to prep your work space, I promise. This stuff is messy. Or maybe I'm just messy. But historically I'm not messy with wet/goopy stuff and I was messy with this. So get some dropcloths/plastic to protect your lower cabinets and floors. The concrete gets heavy when it's on the plastic, too, so make sure you tape it to the top edge really good. I had my tape let go and then I had concrete dripping down behind it onto my cabinets and was frantically trying to get it re-taped while also covered in concrete, which is about as easy as it sounds.
I'd also recommend having a partner to help you. I did it by myself and it would've definitely been helpful to have someone to assist.
If you're doing a formica counter like me, just give it a sanding before you start to give it some texture to stick to. I used a 120 grit.
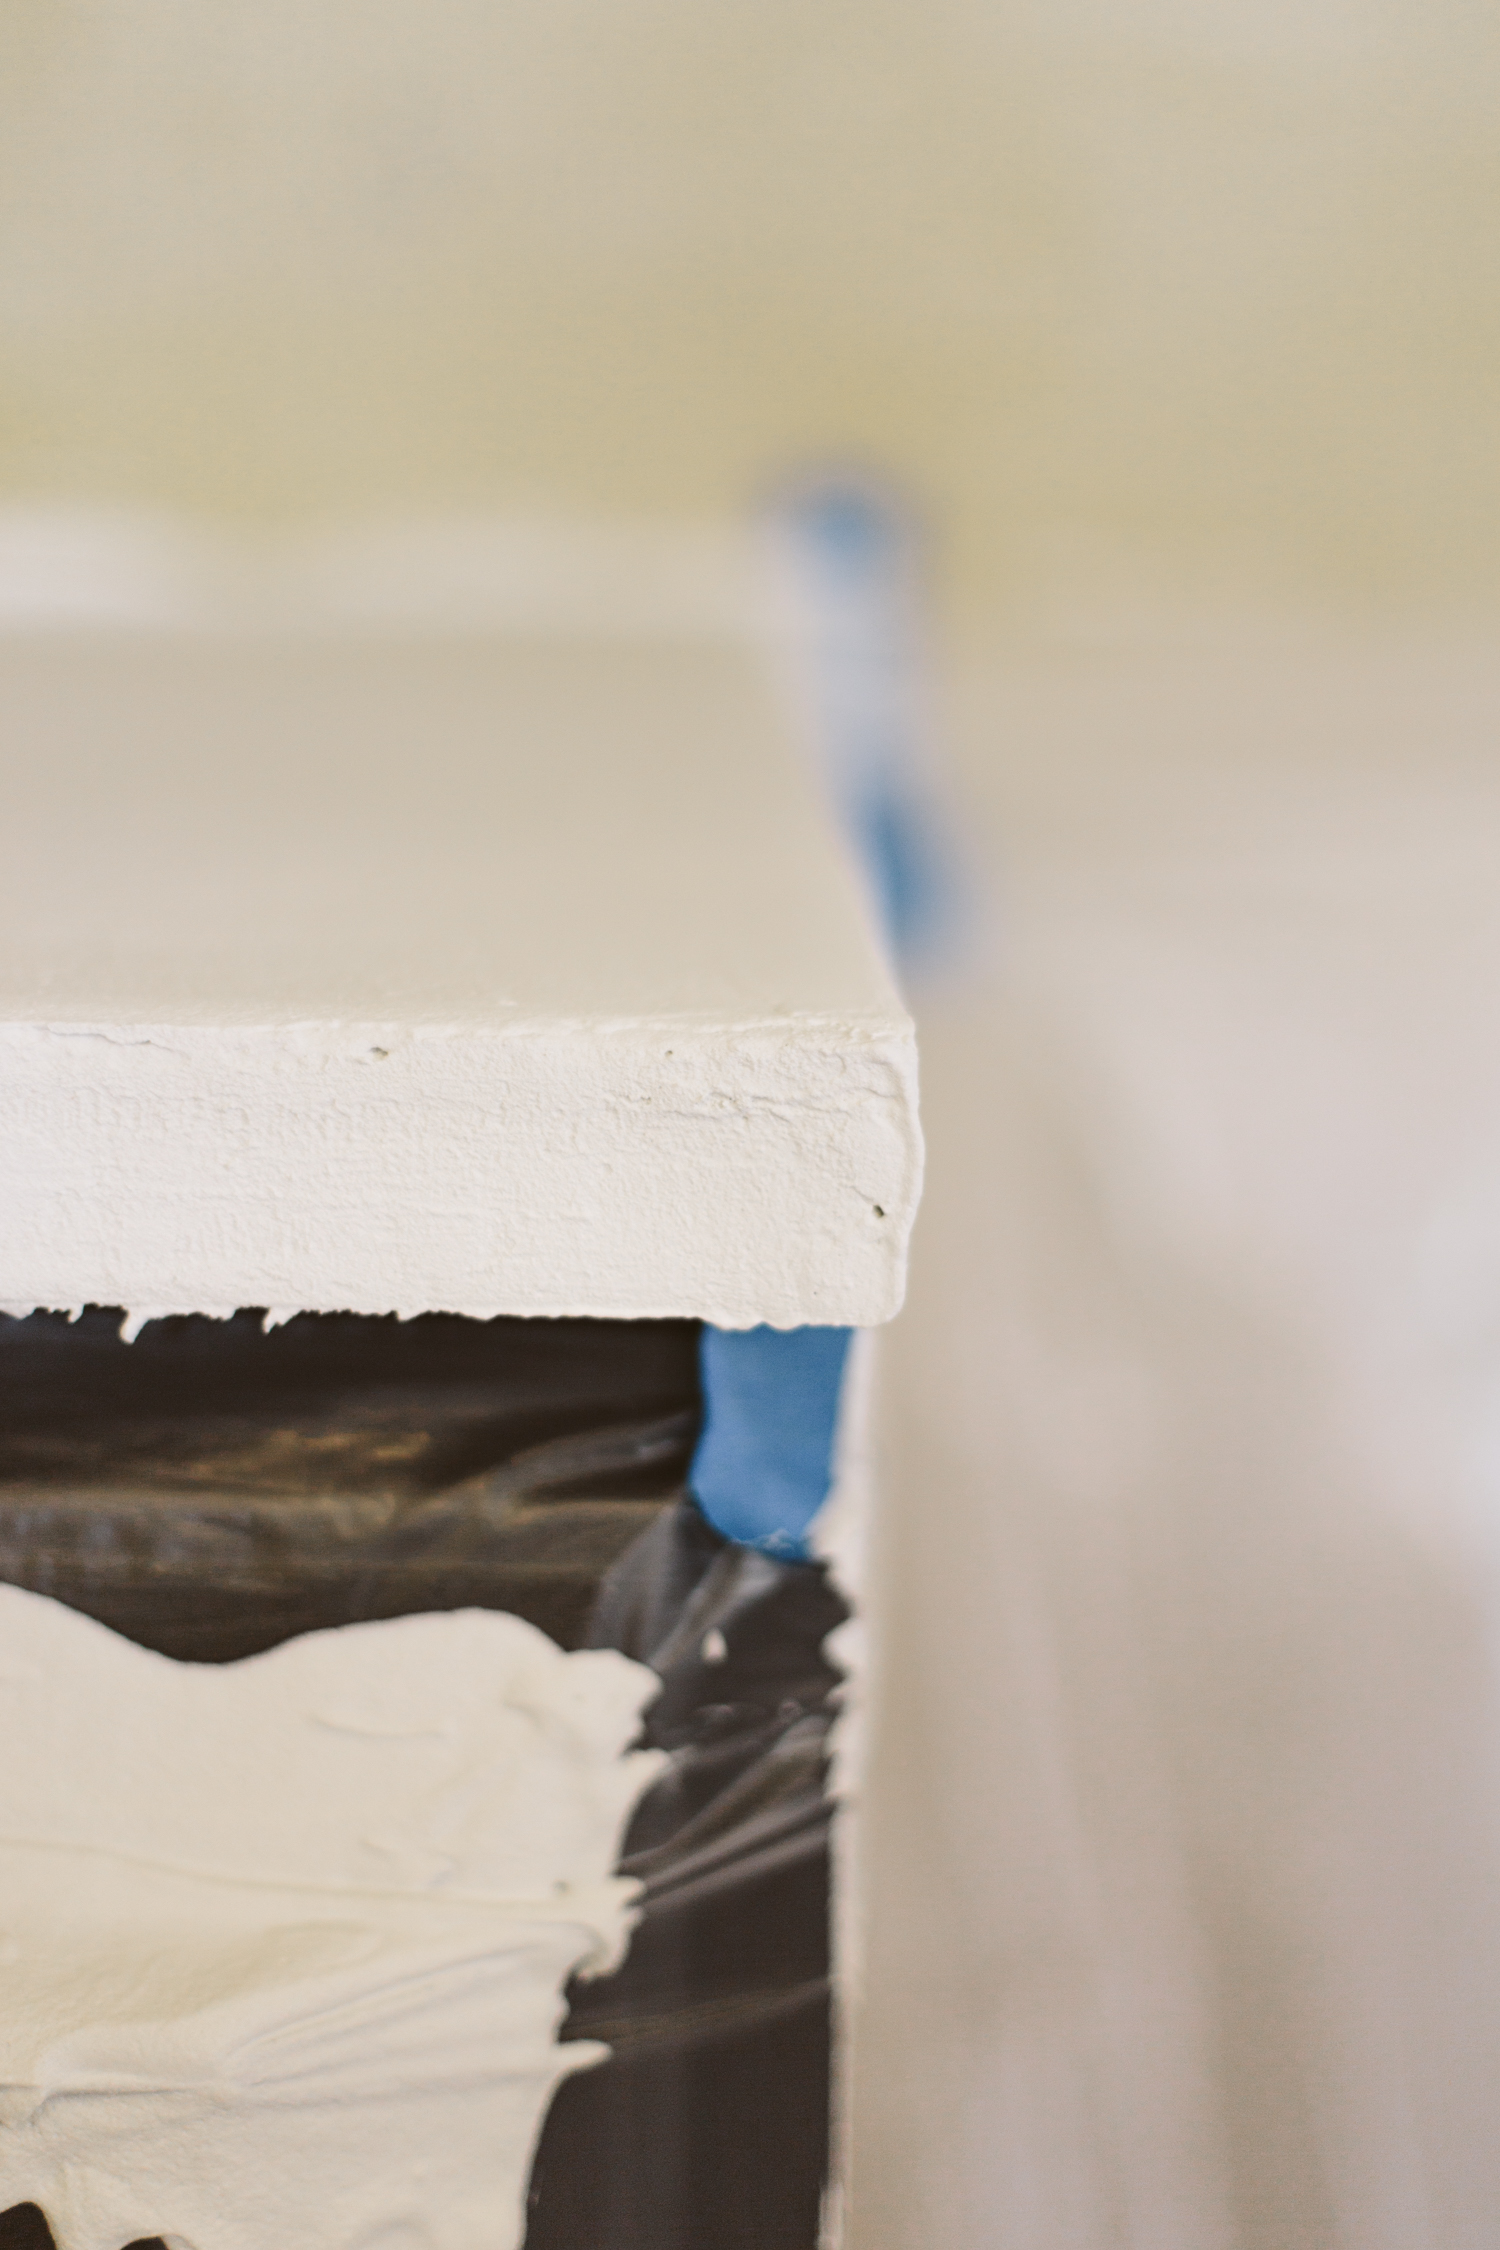
The first thing you'll do is the front vertical edge, which needs a bit of a thicker consistency to stick, so make up a small batch of that (If you're using the DCI product they send lots of instructions on how to use it/make a batch, and they also have lots of video tutorials on their site which I watched thoroughly before starting). For the top surface you want it mixed to a pancake batter consistency, but with the vertical surfaces, you want it much more thick and sticky. I bought a mixing accessory for my drill, which I used to mix the concrete. Since I wasn't making huge quantities, I could just mix the product and water in a 5 gallon bucket (or smaller for the vertical surface batch) with my drill.
Once you've made up your more sticky batch, apply that just with your hands wearing vinyl gloves. It's a little hard to get a smooth finish, but I wasn't too worried about that because I didn't mind getting a more "rustic" finish. You can use a trowel to smooth it out too if you want it more uniform.
Then mix up your batch for the top, to about a pancake batter consistency. You can pour it directly on the counter and then smooth it out with a trowel. You want about a 1/8 - 1/4 inch thick skimcoat, and do your best to get it as smooth as you can because it's super annoying to have to sand and put another slurry coat on there.
This product doesn't require a second coat (unless you want to fix some errors) so you just have to wait 24 hours to let it dry and then seal it with the sealer!

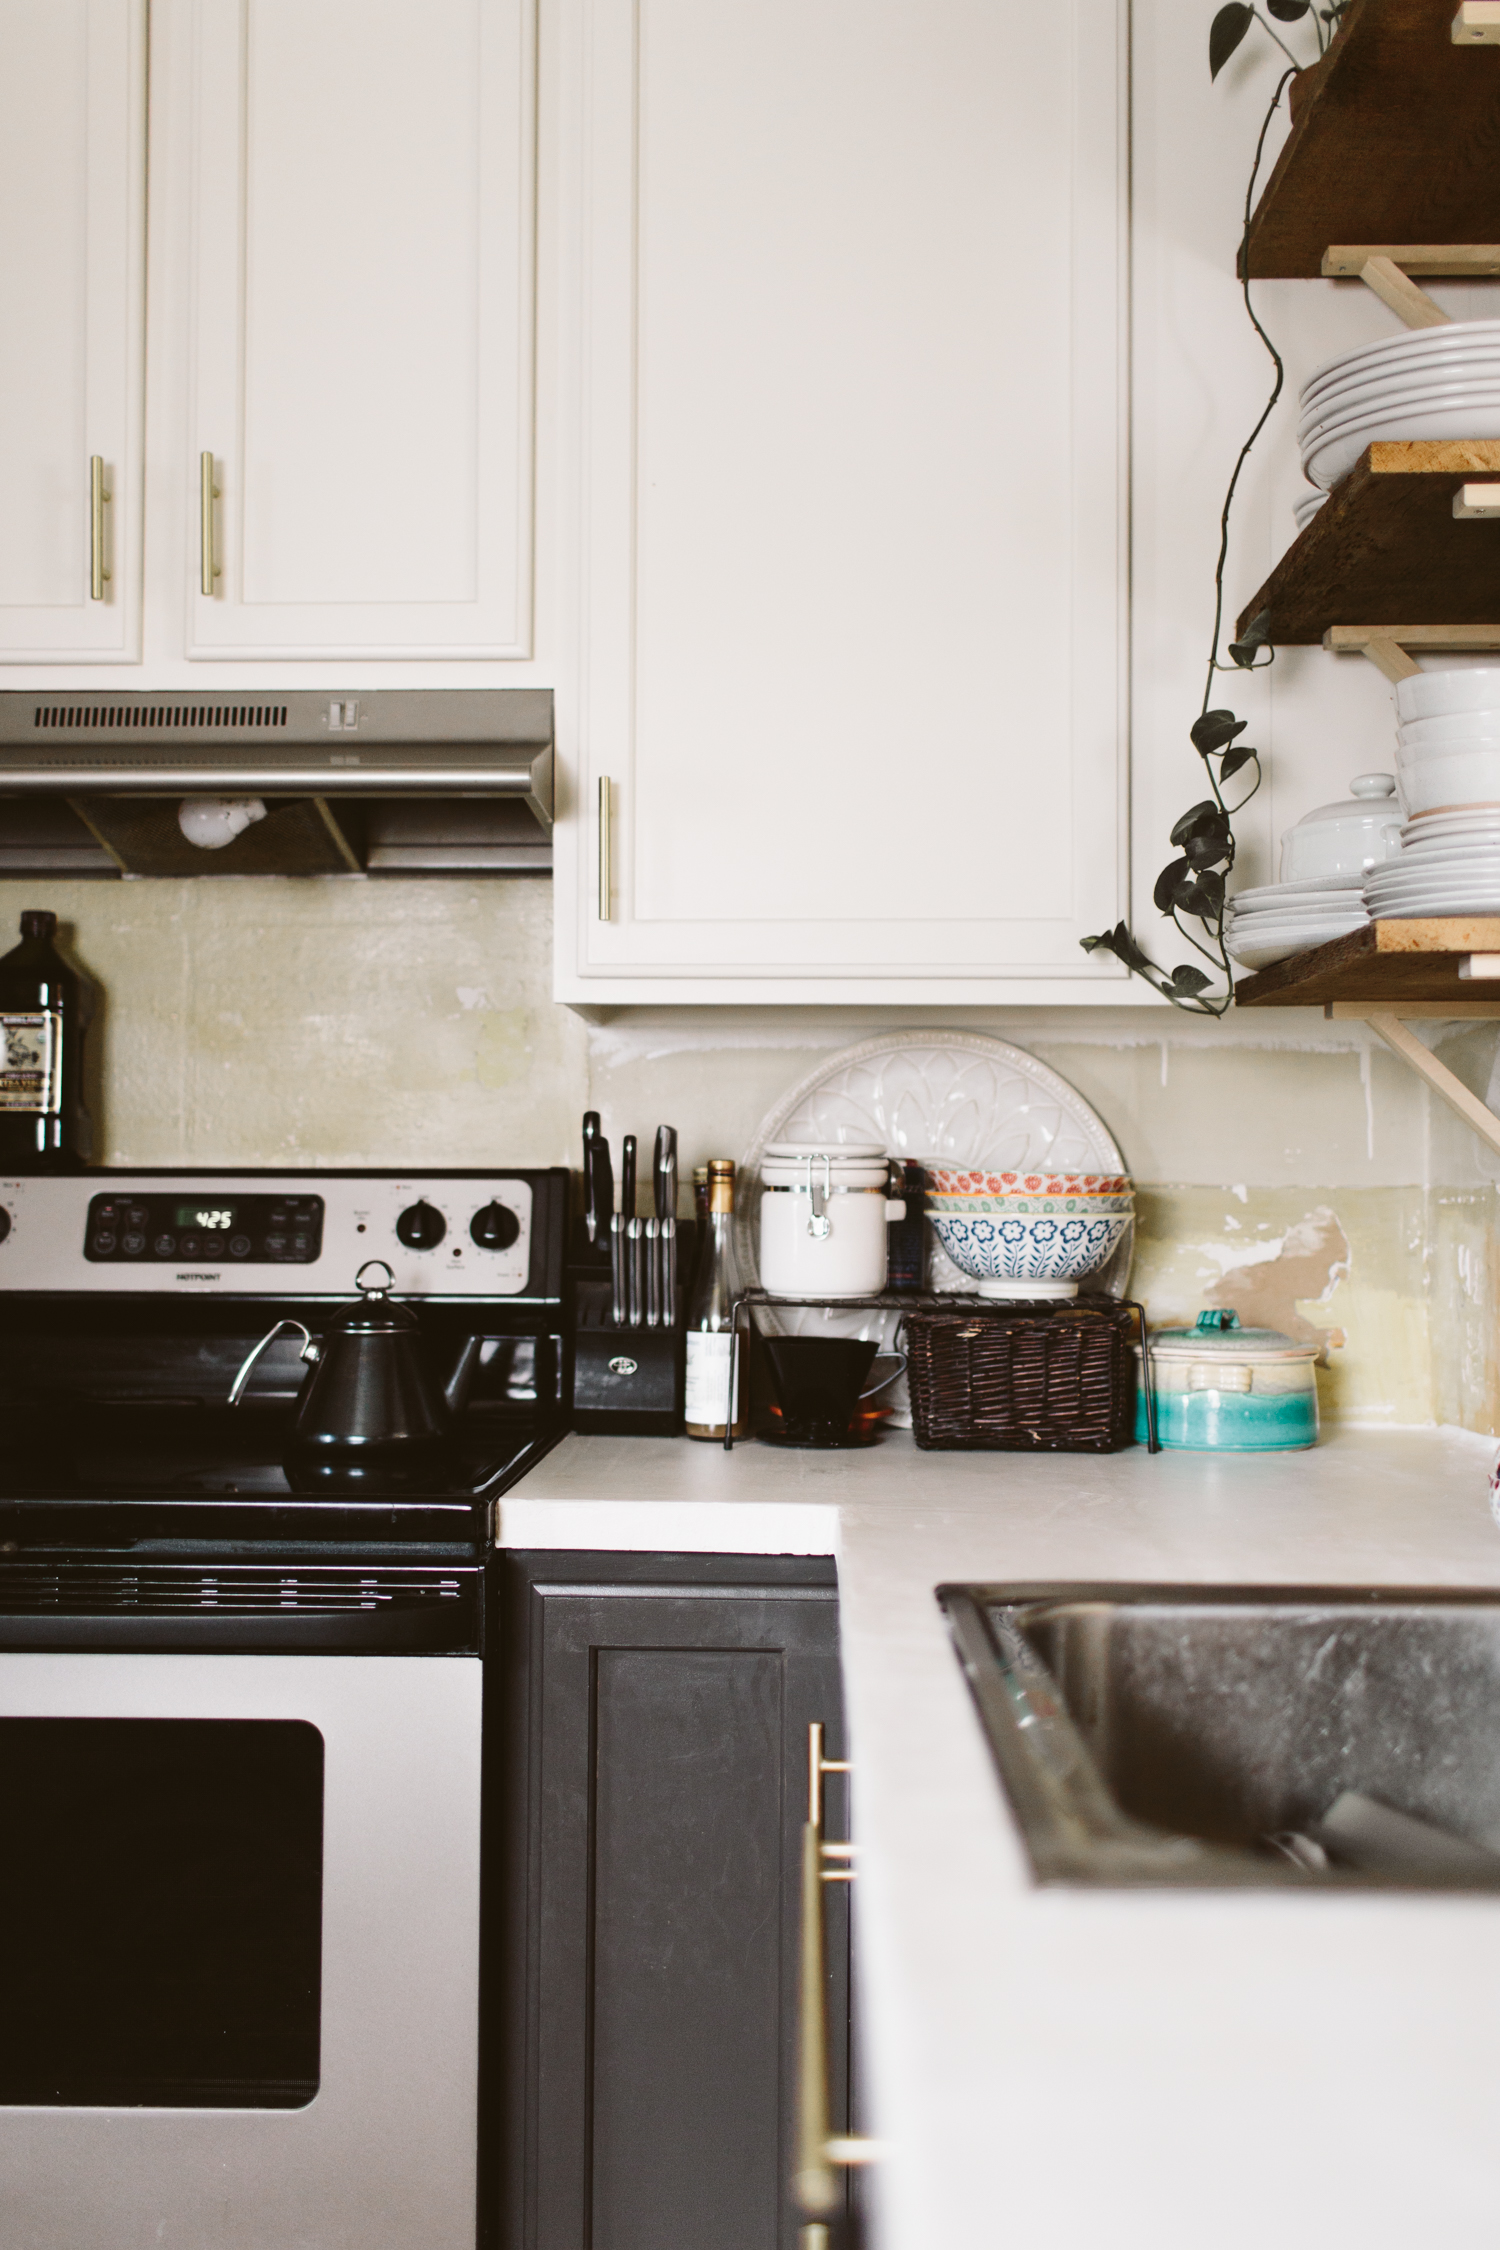
I've only had the counters for about a month and a half, but I really like how they've been holding up. I haven't had any staining, which I was a little worried about since they are white, and no chipping or any other issues. Obviously that's not a lot of time for regular wear and tear to conduct a really good evaluation so I'll update in a while once it's had time to be sufficiently tested. That being said I know two people who have refinished their counters by skimcoating with concrete and both were super happy with it (and one is in an RV, so you know that gets jostled around a lot while on the road!). Neither of those folks used the same product that I did, so it's not exactly the same, but the finish as a whole seems solid and durable!
DYING TO TRANSFORM YOUR OWN KITCHEN, BUT AREN’T SURE WHERE TO START, HOW TO BRING YOUR VISION TO LIFE, OR NEED HELP FIGURING OUT HOW TO MAKE IT ALL HAPPEN? I’VE GOT YOU COVERED! HEAD OVER HERE AND LET’S GET STARTED ON WORKING SOME DESIGN MAGIC FOR YOU!
You Might Also Like


Nettle Florentine Pasta

One of my favorite things about summer is farmers market season and all of the fresh produce that comes in my CSA (Community Supported Agriculture) box every week! When I first started getting a CSA last summer, I learned how to prepare a ton of obscure (to me) produce I’d never seen before. One new thing that popped in my CSA this summer was stinging nettles. I worked at a summer camp a few years ago and learned how to eat raw nettles in the wild, but I’d never thought about using nettles while cooking until we got a big batch of them in our CSA share. Nettles are rich in vitamins A and C, iron, potassium and calcium, and since they saute-down nicely (and lose the sting when cooked), I decided to treat them like I would spinach and make a chicken Florentine. It worked great.


Ingredients
- 1 pound Penne
- 4 whole boneless, skinless chicken breasts
- Salt and pepper, to taste
- 2 tablespoons butter
- 2 tablespoons olive oil
- 4 cloves garlic, minced
- ¾ cups dry white wine
- ¾ cups low-sodium broth (more if needed)
- 3 cups stinging nettle leaves
- 2 cups grape tomatoes, halved lengthwise
- 4 ounces parmesan cheese, shaved
- Cook pasta according to the directions on the package. For more flavor, add a pinch of salt to the water. Drain and set aside.
- Cut chicken breasts into chunks and sprinkle with salt and pepper.
- In a large skillet, heat the butter and olive oil over high heat. Add chicken in a single layer and don’t stir for a minute or two to allow the chicken to brown. Flip the chicken and brown the other side. Cook until done. Remove chicken and set aside.
- Lower the heat to medium and add garlic, making sure to stir quickly to avoid burning. After about 30 seconds, add wine and broth, stirring to deglaze the pan. Allow the liquid to bubble up, then continue cooking until it’s reduced by at least half (most of the surface of the liquid should be bubbling at this point).
- Turn off the heat and add nettles, tomatoes, chicken and cooked pasta to the skillet. Toss to combine; the nettles will wilt as you toss everything. Add plenty of Parmesan shavings and toss to combine. Serve with extra Parmesan shavings.

How to Handle Nettles
Nettles can give you nasty stings if you don’t handle them carefully, so make sure you don’t sting yourself while preparing meals or while harvesting. Wear gloves when handling. Use tongs and a salad spinner when cleaning nettles. Stinging nettles have hollow stinging hairs called trichomes on the leaves and stems, which act like tiny hypodermic needles to inject histamine and other chemicals that cause an uncomfortable stinging sensation. If you do get stung, though, there are a few natural remedies to relieve the sting. First, you can make a paste out of a little baking soda and water and rub that onto the affected area, which should help reduce the sting. You also can mix a couple drops of lavender essential oil into a tablespoon of coconut oil to make a little salve and rub it onto the sting, and it’ll help take away the stinging sensation.


Keeping an eye out with Ooma Butterfleye
Thank you Ooma Butterfleye for sponsoring this post.

Keeping our home safe is something that's increased in importance dramatically since we brought Jack home. Or maybe it's just a result of binge watching way too many Forensic Files episodes on Netflix. Either way, finding really easy ways to keep our home safe that seamlessly integrate into our lives has become a much higher priority for me, so I was looking forward to parterning with Ooma to try out their Ooma Butterfleye camera.
We used to have a home security system... which I removed so I could wallpaper the wall where it was installed (safety... first?), and while we used to use it daily, when we moved back in October, it just never settled back into our routine and I never reinstalled it. We may eventually install it somewhere else in our home, but I really love how easy the Ooma Butterfleye is in comparison.


With our security system we had someone drill into our wall to install the keypad, it was attached to our only outlet in the room, and was kind of stressful to arm/disarm. What I really love about the Ooma Butterfleye is that not only is it a camera, which our other system didn't have, it is battery powered so we can put it anywhere in the house we'd like monitored (heck, I could probably use it as a baby monitor in Jack's room if I needed!), it sends updates right to my phone, and it automatically goes into private mode when it senses that my phone has entered the home, so I don't have to manually turn it on or off.
It doesn't have an alarm or anything, which is one reason I think eventually I'll reinstall our security system (I do like that a loud alarm will go off if an intruder enters after that system has been armed), but you can set it to recognize familiar faces, so it won't keep telling you an unidentified person is in the room when it's just your husband.
I like too that it's small and can be easily hidden or blended into your decor. Nowadays we're all used to having an Alexa or Google home sitting on a counter, so something small like the Ooma Butterfleye kind of just disappears to the eye.

My favorite thing about it is that I manage everything with my phone which is super easy and straightforward, which is what I need now that I'm a mom and pretty much nothing else in my life is easy and straightforward.
If you want to enter to win your own Ooma Butterfleye, just follow the directions below! The giveaway will be open from Aug 20- Sept 4
Winners will be randomly selected and notified by CLEVER by Friday, September 7
I was selected for this opportunity as a member of CLEVER and the content and opinions expressed here are all my own.
You May Also Like


4 super easy houseplants for beginners

I never considered myself much of a green thumb for most of my life. Growing up, my mom grew flowers in the summer, but we always had faux interior plants, so I never much thought about having houseplants. The first time I got houseplants was shortly after we bought our house. I'd found those two macrame plant hangers at a thrift store and needed something to put in them, so I headed to Home Depot to find a suitably vine-y, hanging plant and bought the two pothos that still live in those hangers.
In the ensuing five years I have killed plenty of house plants. I'm certainly no houseplant genius, and my thumb is only mildly green, but I've learned which plants are pretty fool-proof and easy to care for, so I wanted to share four of my favorites!

Pothos
I love my Pothos. I have several but I want dozens more. They have the perfect cascading vines, are SO easy to keep alive, and they do alright in low-ish light, so I even have one in my bathroom which only has one tiny window. Bonus? They are super easy to propagate, so if you have one, you can make more! It's like getting free plants!
Snake Plant
The Snake plant is SO easy to take care of. You can ignore this bad boy for a looong time and it'll stay happy. I have a couple of these and they are so hardy and add a really cool architectural look that is different from other leafy plants. These do very nicely in low light, so we have one in our bedroom where we have a couple windows, but usually keep the blinds down because sleep.

Philodendron Selluom "Hope"
This is very similar to a Monstera, but it has leaves that have a little more of a "ruffled" edge than the smooth-edged leaves of the Monstera. These can grow pretty big (a local coffee shop in town has a huge one that is amazing!), and it's very easy to care for and keep alive.

Peace Lily
I love how lush the Peace Lily is. I also love how they droop when they need water. Three cheers for communicating your needs, little plant! If they start to droop, you just give 'em water and they're happy again and perk up in a matter of minutes.

Plants I've had trouble with that I personally am avoiding for the time being: Majesty Palms, Ferns, Fiddle Leaf Figs, Succulents (not counting cacti and hens and chicks. All my other succulents have tended to get leggy and eventually die).
A few other plants I've found relatively easy: Croton, Cacti, ZZ Plant, Hens and Chicks (these are also awesome outdoor ground cover!). Make sure you note how much light a plant prefers, and how much water it likes. You can usually find this info on the tag when you buy it, or just look it up online! I like to keep a loose schedule for watering my plants because in the past I've killed plants simply because I didn't water them enough. Right now my Sundays are plant watering days! You can also buy plant food to help your little plant friends grow and be happy too. I use this stuff about once a month.
Houseplants can feel intimidating if you've never had them (or have killed off a few), but starting slow and with some easier, low-maintenance plants is a great way to bring happy plant vibes and fresh air to your space without the stress of taking care of a living thing that's threatening to die constantly.
You may also like


I want to be your Design BFF

Friends! I'm so excited to finally be launching Design BFF sessions! I've spent years fielding design questions from friends, family, and online followers, that I finally decided to make it an official service that I offer.
Designing your own home can be paralyzing! There are so many colors, fabrics, tiles, furniture, and even if you have a healthy Pinterest board of inspiration, finalizing your finishes and figuring out how to put it all together can feel overwhelming. You need a design bff!
I love being able to come in and cut through the noise to help you create a space that is joyful and beautiful. Whether you need help deciding on paint colors/tile/etc, are down to DIY your renovation but aren't sure where to start, or need help shopping for lighting, hardware, or furniture, I'm excited to guide you and help you nail down your vision.


Want to know how it works? Head over here to get the scoop. It's an easy process that will give you direction and clarity and get you moving in the direction of your dream space! I love creating budget friendly design, so if you don't have a load of cash to drop on your new design, don't freak out. I'm happy to work with your budget, big or small, to help you make some magic.
One thing I want you to keep in mind is that you don't have to do you transformation all at once. I'll give you a plan and direction, but you don't have to bust out a whole room in a weekend if you don't have it in your time and money budget! All of my own personal design projects have taken many months to finish because I spend money as I can, and do projects as I find time (which isn't often as a new mom!). We all see those crazy HGTV shows where people get a brand new kitchen renovated in a week, but that's just not realistic for most of us! Give yourself realistic expectations and be okay with doing things a little at a time, that's how most of us do it!


If your interest is piqued and you feel like this might just be the thing you need to help you finally transform your room(s) into a space that brings you joy, head over here to get all the details on how it works!


Hi, I’m Liz
I'm an artist, writer, designer, DIY renovator, and … well basically I like to do all the things. If it’s creative I’m probably doing it. I’ve spent over 30 years voraciously pursuing a life steeped in creativity and I wholeheartedly believe creativity and joy are inextricably linked.
Read more…


Explore The Archive
- January 2025
- December 2024
- August 2024
- July 2024
- May 2024
- April 2024
- January 2024
- December 2023
- October 2023
- September 2023
- July 2023
- June 2023
- May 2023
- April 2023
- March 2023
- February 2023
- January 2023
- December 2022
- November 2022
- October 2022
- August 2022
- June 2022
- May 2022
- April 2022
- March 2022
- November 2021
- October 2021
- August 2021
- July 2021
- May 2021
- January 2021
- November 2020
- October 2020
- September 2020
- August 2020
- July 2020
- June 2020
- May 2020
- April 2020
- February 2020
- January 2020
- November 2019
- October 2019
- August 2019
- July 2019
- June 2019
- May 2019
- April 2019
- February 2019
- January 2019
- December 2018
- November 2018
- October 2018
- September 2018
- August 2018
- July 2018
- June 2018
- May 2018
- April 2018
- February 2018
- January 2018
- November 2017
- September 2017
- August 2017
- July 2017
- June 2017
- May 2017
- April 2017
- March 2017
- February 2017
- January 2017
- December 2016
- November 2016
- October 2016
- September 2016
- August 2016
- June 2016
- May 2016
- April 2016
- March 2016
- February 2016
- January 2016
- December 2015
- November 2015
- October 2015
- September 2015
- August 2015
- July 2015
- June 2015
- May 2015
- April 2015
- March 2015
- February 2015
- January 2015
- December 2014
- November 2014
- October 2014
- September 2014
- August 2014
- July 2014
- June 2014
- May 2014
- April 2014
- March 2014
- February 2014
- January 2014
- December 2013
- November 2013
- October 2013
- September 2013
- August 2013
- July 2013
- June 2013
- May 2013
- April 2013
- March 2013
- February 2013
- January 2013
- December 2012
- November 2012
- October 2012
- September 2012
- August 2012
- July 2012
- June 2012
- May 2012
- April 2012
- March 2012
- February 2012
- January 2012
- December 2011
- November 2011
- October 2011
- September 2011
- August 2011
- July 2011
- June 2011
- May 2011
- April 2011
- March 2011
- February 2011
- January 2011
- December 2010
- November 2010
- October 2010
- September 2010
- August 2010
- July 2010
- June 2010
- May 2010
- April 2010
- March 2010
- February 2010
- January 2010
- December 2009
- November 2009
- October 2009
- September 2009
- August 2009
- July 2009
- June 2009
- May 2009
- April 2009
- March 2009
- February 2009
- January 2009
- December 2008
- November 2008
- October 2008
- September 2008
- August 2008
- July 2008

VISIT THE SHOP


PRIVACY POLICY & DISCLOSURE
We are a participant in the Amazon Services LLC Associates Program, an affiliate advertising program designed to provide a means for us to earn fees by linking to Amazon.com and affiliated sites.